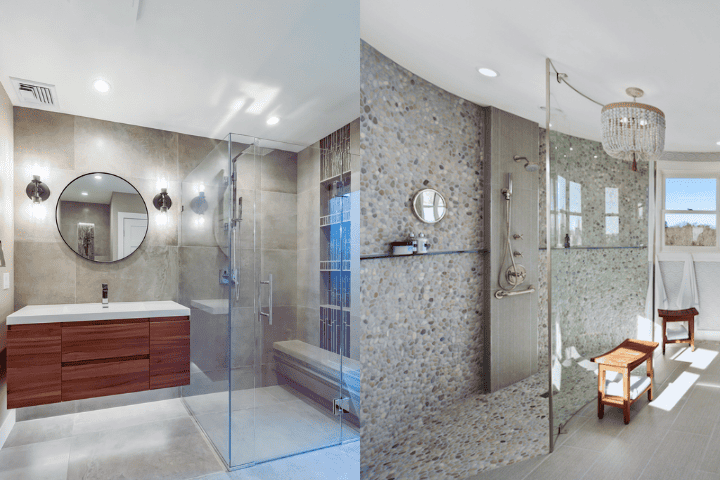
Undoubtedly, the elegance of your bathroom relies on the shower area. If you’re looking for a modern yet elegant shower, a Curbless shower is the best. The absence of a traditional curb lets you enter and exit easily. You must be thinking about the installation process of the curbless shower.
The installation process of the curbless shower includes various steps from plumbing modifications to the slope and drainage. You can also go for a professional for your curbless shower installation.
In this writing, I’ll give you the tools you want for installation and a step-by-step guide. So, without further ado, let’s get straight into it.
But if you want to read “Why Curbless Showers are Worth it,” then I have made a separate section for it too.
Tools & Materials For Installation

The tools and materials that you need during the installation of the curbless shower are given below.
- Hammer
- Circular Saw
- Pencil
- Paint Roller
- Paint Brush
- Impact Driver
- Pry Bar
- Waterproofing Tape
- Screws
- Caulk Gun
- Latex Caulk
- TrueDek Drain
- TrueDek Base
- Tape Measure
- Tank-10 Waterproofing
You must gather all the equipment before starting the procedure.
Curbless Shower Installation Process
The installation process of a curbless shower involves the following steps.
Decide The Space
The first step is determining the location for the base of a Curbless Shower. I’ll suggest you get a base that is smaller than the shower floor. A smaller base gives you flexibility in base placement.
However, you can also trim the shower base with the help of a circular saw. Make sure that the drain hole is far from the floor joists. After this, outline the shower base of the subfloor with the help of a pencil.
Trim The Subfloor
Now cut the subfloor according to the outline with the help of a circular saw. A multitool will assist you to finish the cuts at the ends of the subfloor. As you move along after cuts, you should use a pry bar on various pieces.
To reinforce the floor, I will recommend you add 2×4 blocking. This blocking can be secured by using construction adhesives and screws.
Establishing Shower Base
Here comes the time to install a shower base. After installing the 2×4 blocking, you should apply adhesive all over the floor to make a connection with the bottom of the base. Now, fix the shower base by driving screws in the hole.
The holes must be pre-drilled so you don’t have to worry about it while installation.
Backer Board Installation
After the installation of the shower base, a ¼” cement board must be installed all over the bathroom and in the surroundings of the shower base. A ½” cement board must be applied on the walls of your shower.
Now, it’s time to caulk all the screw holes with the help of latex caulk. Many of you might be using silicone but you must know that the waterproofing material will not stick on the silicone. Therefore, it’s better to use latex caulk.
Waterproofing
Waterproofing is the most crucial step in the installation of a curbless shower. The waterproofing materials include waterproofing tape and Tank-10. All you have to do is brush the Tank-10 and cover it with waterproofing tape.
Brushing another layer of Tank-10 will ensure the waterproofing of your shower. Never forget to waterproof the joints are the areas where the cement board and base are connected.
According to my research, a few experts also recommend brushing 3 layers of Tank-10.
Settle down The Drain
For the proper drainage of curbless showers, you must install an excellent drainage system. According to my research, a linear drain system is best for Curbless Showers. A linear drain system gives you both style and functionality.
Choose a drain’s system location and make sure of a perfect slope for smooth water flow. Make an opening in the subfloor to accommodate the drain and connect it to the existing plumbing system.
You should seal the area around the drain to prevent any leaks or water damage.
Spread The Tile
Here comes the final step of installing Curbless Showers. Install the tiles on the floor appropriately. Before selecting the tiles, you must consider that the tiles are suitable for a wet environment. Your tile’s design must be similar to the theme of your restroom to ensure elegance.
I’ll advise you to use tile spacers for the maintenance of gaps between tiles. Once you’ve installed all the tiles, wipe away any excess grout. And your curbless shower is installed successfully.
By now, you have walked through all the steps. If you think that you can’t do it on your own, you must call a professional to do it for your restroom.
Why Choose Curbless Shower?

Are you thinking about why to choose a Curbless Shower? Well, various reasons allow you to go for curbless showers. A few of them are given below.
Graceful Style
The first thing that insists you purchase a curbless shower for your restroom is its design. The absence of curbs in a curbless shower enhances the elegance of the bathroom. Curbless showers come in various sizes and designs.
So, if you’re renovating your bathroom, you must try curbless showers. They will provide your washroom with a sleek and modern look.
Secure Entry & Exit
Another reason to go for a curbless shower is its accessibility. A Curbless Shower gives you a safe entry and exit. If your family has kids or grandparents, you must go for curbless showers. The fear of your kid falling from the curb will be zero.
Elderly people with mobility issues find it difficult to step in from the steps. So, curbless showers are best for the safety of kids, elderly folks, and people with mobility challenges.
Related: Can you install shower doors on porcelain tiles?
Conclusion
In conclusion, I would like to say that curbless showers add more glam to your restroom. If you’re thinking of installing your curbless shower on your own, the above guide is for you. All you have to do is skim the steps carefully and perform them accordingly.
From the above writing, you’ve also fetched the reasons behind choosing a Curbless Shower. Curbless showers are safe and easily accessible, so it is perfect for people of every age.
Therefore, install a curbless shower and enjoy the aesthetic shower now.